Maintaining Safety on the Road: The Importance of Brake and Clutch Repairs

Ensuring your safety, as well as the safety of others on the road, should always be your top priority as a responsible driver. However, one critical aspect of road safety that often gets overlooked is the regular maintenance of a vehicle’s brakes and clutch. In this blog post, we’ll highlight the significance of brake and clutch repairs for keeping everyone safe on our roads.

Why do Brake and Clutch Repairs Matter?

Brake and clutch repairs are essential for road safety, ensuring reliable vehicle performance, effective braking, and smooth gear changes. Ultimately, your brakes and clutch help prevent accidents and keep you in control on the road.

1. Ensuring Optimal Braking Performance

Brakes are your first line of defence when it comes to avoiding accidents and maintaining control over your vehicle. Regular brake inspections and timely repairs help to identify any potential issues before they escalate into major problems. Faulty brakes can compromise your ability to stop quickly, particularly in emergencies, which can have catastrophic consequences.

2. Preventing Brake Failure

Brake failure is a nightmare scenario for any driver. It can lead to loss of control, collisions, and even fatalities. When you schedule routine brake inspections and promptly address any signs of wear or malfunction, you significantly reduce the risk of brake failure. At Steve Sorensen Mechanical, our expert mechanics identify warning signs, such as squealing noises, vibrations, or spongy pedal feel, and address them before they escalate.

3. Maintaining Clutch Performance

A properly functioning clutch ensures smooth gear changes and overall vehicle control. Neglected clutch systems can develop serious issues, such as slipping, sticking, or difficulty engaging gears, leading to reduced efficiency and potential accidents. Regular inspections and necessary repairs help maintain optimal clutch performance, ensuring a safe and comfortable driving experience.

Warning Signs

Early recognition of a problem helps to prevent the situation from escalating and ending in either an accident or expensive brake and clutch repairs. So keep an eye out for the following warning signs:

1. Brake System

  • Squeaking, squealing, or grinding noises when applying the brakes.
  • Increased stopping distances or a noticeable reduction in braking power.
  • Vibrations or pulsations felt through the brake pedal.
  • Brake warning light illuminated on the dashboard.
  • Leaking brake fluid or a spongy pedal feel.

2. Clutch System

  • Difficulty shifting gears or gears slipping out of place.
  • Grinding or rattling noises when engaging the clutch.
  • Burning smell emanating from the clutch.
  • Increased pedal effort or a soft pedal feel.
  • Clutch slipping or failing to disengage properly.

Seeking Professional Assistance

If you notice any of the warning signs mentioned above or suspect problems with your brake or clutch, it’s essential to seek professional assistance promptly. Our qualified mechanics can diagnose the issue accurately, provide expert advice, and carry out the necessary repairs using quality parts and equipment. We are specialists in brake and clutch repairs!

Call Steve Sorensen Mechanical Today

Maintaining the safety of your vehicle’s brake and clutch systems is vital for safe driving and peace of mind on the road. That’s why it’s important to prioritise regular inspections and timely repairs, helping to prevent accidents, minimise the risk of brake and clutch failure, and ensure optimal performance.

Remember, your safety and that of others depend on the reliability of your vehicle’s braking and clutch mechanisms. Don’t compromise on safety – schedule your brake and clutch repairs today!

Diagnostics – Why an evidence based testing process is cheaper in the long run

CLICK HERE TO VIEW THE PDF MAGAZINE ARTICLE WITH IMAGES
0001


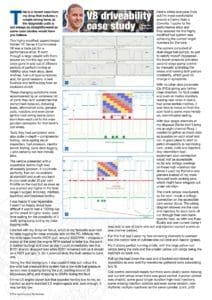
Brendan’s latest article in The Automotive Technician national trade magazine is a great example of why paying some labour time to carry out evidence-based testing to get to the root cause of your problem is our preferred diagnostic method and ends up cheaper in the long-run.  We hate seeing cars who have suffered guess-nostics or swap-nostics elsewhere, with unnecessary replacement parts on modern vehicles often costing well more than thorough testing would have if the time was taken initially.

This edition I will run through a recent case study from my shop, with a couple wrong turns as the diagnostic path is not always as straightforward as some case studies would have you believe.

This highly modified, Supercharged V8 VEII Commodore was a trade job for a performance shop.  It went through a large build with them around 6 months ago and since then had gone in and out of different periods of perfect running 1000+hp track days, dead misfires, fuel cut type symptoms and for good measure, a new flywheel and bellhousing from an exploded clutch.

Throughout these changing symptoms also came an extensive list of parts they (and sometimes the owner) had replaced including leads, aftermarket coils, genuine coils, injectors and even donor ignition coil wiring looms (short loom from each coil to the main junction connector for that banks coil wires).  Tests they had completed were also quite in-depth – compression testing, valve spring visual inspection, fuel pressure, injector bench testing, dyno datalogging – certainly not 2-minute jobs.

The vehicle presented to me with a repeatable mid to high load driveability problem.  It could idle perfectly, free-rev no problem at standstill, and push you back in your seat under 20% throttle on the road, but as soon as you pushed any higher in the load range it surged, knocked, misfired, backfired and hesitated terribly.  I was happy it was repeatable; I wasn’t so happy about how difficult it is to test a 1000hp car on the street at higher loads and each time waiting for the possibility of it really going BANG during my datalogging pulls.

I started with my Snap On Solus, which is my favourite scantool for datalogging for deep analysis later on the PC.  Midway into the WOT pull, around 3500rpm, I dropped a cursor at the point the engine rpm started to faulter (the point it started faulting), and clear as day I could see immediately B1S1 sharply dropped lean, while B2S1 remained rich as it should on a WOT pull PIC 1.  So, it seems likely the fault relates to Bank 1.

Taking the first wrong turn, I also couldn’t help but notice the low side fuel pressure (this system has a low-side fuel pressure sensor) was dropping during the pull, starting around 35kpa and dropping to 32kpa during the fault – I’m no LS engine expert but that sounded terribly low to me.  I pulled up some standard LS engine specs and sure enough this was terribly low.  Here’s where everyone finds out I’m more comfortable around Camry’s than Corvettes – I spoke to the performance shop and they assured me for this highly modified fuel system it is achieving the correct target numbers for the tune.  The system consists of dual stage fuel pumps, so just to satisfy myself I bypassed the boost pressure activated 2nd stage pump control by manually activating the relays and running both pumps constantly, which gave no change in symptom.

With no other data PID’S giving any further clear direction, no fault codes and even all misfire monitors reading 0 when it clearly had some terrible misfires when faulting (perhaps this is something the tuner had edited) it was time to move on from the scantool, to some more hands on non-intrusive testing.

With 4 scope channels at my disposal (Santa didn’t bring me an 8-channel Pico), I needed to gather as much data as possible on each short test run.  A good place to start on petrol driveability is monitoring cam, crank, coils and injectors.  Any intermittent test equipment poor connection would not be acceptable, so for any voltage readings on these high vibration test drives I used my Pomona wire piercers over my more favourable back probing pins which might wriggle out under vibration.  The crank sensor was buried, so for now I made a voltage connection on the accessible cam sensor (blue).  Consulting the wiring diagram showed me the coils and injectors for each bank all run through their own bank specific fuse – so with one fuse buddy and one current clamp I was able to see all Bank 1 coil and injection current events on one channel (yellow).  For this first test I used my two remaining channels to connect into the control wire of Cylinder 1 coil (red) and injector (green).

Pic 2 Shows perfect running at idle, with the large yellow coil ramps being the coils and the smaller yellow coil ramps being the injectors on bank 1.  Roll on the load down the road and it bucked and kicked as repeatably as ever and the waveforms gathered were astonishing Pic 3.

Coil control remained steady, however there were clearly some missing coil current ramps when there was good control.  Injection control was chaotic, some good longer duration high load injections, some missing injection controls, and even some random, non-rhythmic multiple injections on the same cylinder.

In hindsight now, the steady coil control should have led me elsewhere, but intrigued I let the car cool overnight and returned to waste half an hour making solid connection on the crank sensor, only to find my cam and crank sensors reported steadily throughout the fault.

After a cup of coffee mulling over some wiring diagrams, I focussed on a Haynes Pro earth point location diagram. Engine running, I ensured all earth points in the engine bay had no excessive voltage drop by measuring between it and battery earth, all giving a good reading under 50mv.  Those that I couldn’t physically access the ground lug, I tested at the wiring loom connectors further up the circuit where more accessible.  To up the ante, engine running I also used my high current test light – a H4 headlight with low and high beam bridged to give a decent 10amp current draw, to ensure all earth points in the engine bay could light my bulb brightly.

Engine off, while I had it out, I also used the H4 test light to confirm my coil power and earth, and injector power could also light the bulb brightly.  Here’s your first hint – content with the bright bulb, I skipped carrying out voltage drop testing with my multimeter on these circuits, could this have changed my path?

Running over the facts so far with the guys in the shop, there is always one who says those all too familiar words – maybe it’s the ECU.  It didn’t sit right with me – such a load dependant fault, able to function logically at other loads, when you think of the ECU on a circuit board level it’s not the way an ECU fails.  Couldn’t hurt to check though, so I wasted another hour or so digging the ECU out to brightly light my H4 bulb on all the power and ground supply circuits on the unplugged ECU connector.

I remembered the scope capture showing a coil control event with no current ramp – that seemed like the lowest hanging fruit to chase at this point, particularly given the list of previous ignition system component replacements that apparently gave temporary relief to whatever symptom it had that chosen month.  Remembering my oxygen sensors were alluding to the fault being on bank 1, I wanted to see if anything was different between a coil on bank 1 and bank 2, since on this engine each bank has its own circuit, basically a known good to compare.

The four wire coils on this GM engine are a little different to others PIC 4.  Left to right they have a power (D), a 5v transistor trigger (C), a dedicated transistor earth wire (B) – running a wire all the way back to the ECU to give a filtered ground, much like a sensor ground does – and a coil ground (A) – to carry the hefty 10amps or so of actual coil current.  3 of the wires are shared by all coils on its respective bank, aside from Pin C, the 5v transistor trigger which is individual to each coil to fire at the correct time.

Not exactly sure what I was looking for, or what I might find, I made voltage connections into Pin B on a bank 2 coil (bank 2 shared transistor earth) (Channel A), a bank 2 coil trigger (Channel B), Pin B on a bank 1 coil (bank 1 shared transistor earth) (Channel C), and this time monitoring bank 2 coil and injector current for any abnormality with an amp clamp at its fuse, to confirm if the fault truly was only on bank 1 (Channel D).

Focussing on Channel A (Blue) and Channel C (Green), there was not much activity on each bank’s transistor earth during idle and low load.  However, during the fault, large peaks started to form, particularly on the bank 1 shared transistor earth, with some of the voltage drops (deviation from true earth 0V) rising to over 600mv PIC5.  Such is the duration and shape of these voltage drop ramps on the green trace, they could be mistaken for coil current ramps if you hadn’t been told what you were looking at.  While activity increased on the bank 2 transistor earth during the fault, the ramps it displayed were predominantly mini versions of what was happening on bank 1 during bank 1 coil events – I would suggest these are actually bank 1 fault events that are making their way electrically onto the bank 2 circuit.

Multiple facts so far pointed to something being amiss on this bank 1 coil circuit.  I thought it through while the car cooled itself and I did a brake job to cool my mind.  I had good coil control, I had tested the power and the ground with a 10-amp test light – BUT, I had not tested them flying down the road during the fault, with heat, vibration and movement.  My thoughts turned to ground point 4, the bank 1 coil main ground, bolted to the rear of the cylinder head, inaccessible so I had proved it could flow 10amps up at the bank 1 main wiring connector.  I hooked the same test light up to this pin again, then shook as much loom as I could reach – and the light dulled!

With great direction, I used a borescope to follow the loom down behind the engine, and bullseye, out of the thick wiring loom at this point exited one single inch long wire, with an exposed wire end, resting on an empty thread in the head where a crimped earth lug should obviously be.  The wire was making a decent earth connection at idle, but when 1000 horses try to rip the motor off its mounts, the connection is compromised.

I’d love to say I could explain the knock-on effects of this poor coil earth, but my knowledge only extends so far to say it looks like the current went looking for a different path, finding its way into the coil transistor earth, causing the large voltage drops as the tiny wire struggled to deal with far more current than it was intended.  The odd extra injections also raise some questions – is the ECU using this transistor earth wire in a Toyota IGF style monitoring, and could it possibly have some contribution into injection timing, surely not?

In hindsight, I would have loved to have spent some more time gathering ‘money shot’s’ like what would have been an extreme voltage drop on the bank 1 coil main earth during the fault, but I had all I needed to take this job to the bank.  With a back probe in the accessible bank 1 harness connector main coil earth pin, I ran a jumper wire and alligator clip to the engine block.  Rolling on the throttle, for the first time I felt the full output of this engine, which prompted a passing pedestrian to I assume ruin his undies as he mimed what must have been a plunger on his forehead as I saw him disappear quickly in my rear-view mirror yelling something along the lines of ‘Banker!’

Vehicle repairs and maintenance: highlighting windscreen wipers

Vehicle repairs and maintenance are essential for the safety of everyone, whether drivers, passengers or pedestrians. That’s why we encourage vehicle owners to book a regular service at our Browns Plains Mechanic Centre so there are no nasty surprises.

Often, however, as time moves on, services are missed and you start to notice small things going wrong every now and again. One of these niggling problems is the windscreen wipers which are often forgotten or ignored until they become a bigger issue.

Windscreen wiper replacement is a serious issue because if the blades are so worn that you can’t see clearly in the rain, it quickly becomes a dangerous situation. The blades often make a horrendous noise or streak across the screen if they’ve perished, which should prompt you to do something about it!

Do you need windscreen wiper replacements?

Part of a sensible car maintenance and repair schedule is to inspect and replace the windscreen wipers if needed. We can even replace the arms if they are past their due date.

Keeping your windscreen wipers in top condition ensures that your forward visibility is always maximised, which is essential when it rains. Wipers that have deteriorated and are no longer able to clear the rain from your windscreen can put your safety at risk. Windscreen wiper replacement isn’t expensive, in fact, it’s quite cheap. So always check the wipers regularly and change them if needed.

Top tips for maintaining your windscreen wipers

To help you keep your wipers in tip-top shape, here are four of our best vehicle repairs and maintenance tips for your wipers.

  1. Keep your wiper blades clean: Over time, a collection of debris and different chemicals can cause the rubber of your wiper blades to deteriorate, resulting in poor performance. A quick clean can be achieved using a mix of vinegar and water. Regular maintenance helps prevent premature deterioration of the blades and postpone the need to drop into our Browns Plains Mechanic Shop to replace the blades (even though windscreen wiper replacement isn’t expensive).
  2. Check placement of the blades: The blades should touch your windscreen along their full length so that they clean the largest possible area. Check to make sure that this is happening and if not, you can ask one of the mechanics at our Browns Plains Vehicle Service Centre to realign them correctly. Of course, you can refit them yourself, but it can be tricky – our mechanic can easily do it as part of your next service.
  3. Check the blades for defects: As the rubber of the blade deteriorates, small pieces can come loose resulting in defects along the blade. Brittle, damaged or cracked wiper blades with pieces of rubber missing are a safety hazard and won’t clean the windscreen correctly, leaving areas that are obscured in the rain. So look for cracks or missing rubber on the blades and corrosion on the wiper arms.
  4. Replace worn wiper blades: As soon as you notice any problems with your wiper blades (usually the first problem is not clearing the rain from your windscreen properly), you must replace the blades. It’s a good idea to replace them every six to 12 months so you always have fully operational wiper blades when needed. It’s also one of the most inexpensive vehicle repairs and maintenance jobs you can do.

Another problem is that your blades may look fine but aren’t moving correctly. In this case, it’s likely there is an issue in the windscreen wiper motor system. Like many things on the modern vehicle, this has advanced in technology, integrating cameras, position sensors and light sensors to communicate with computer modules and operate advanced wiper drive systems capable of several features above just going when you turn the switch on. A booking at our Browns Plains Vehicle Service Centre to diagnose will solve the problem for you.

For prompt and affordable car maintenance and repair, call Steve Sorensen Mechanical – the leading Browns Plains vehicle service centre on 07 3809 2711 or send us an email today.

What’s Involved in a Car Transmission Service?

Just about every car owner understands the benefits of having their car serviced on a regular basis. However, few of us consider that a transmission service might be just as important as a standard service. That’s because your transmission is one of the most expensive components in your car and if it’s ignored and starts to cause trouble, it can be a very costly repair.
For people who service their car every year, it’s easier to remember that their transmission should also be checked at the same time. For other people who service their car irregularly or who depend on their km to dictate when to service their car, their transmission can often be overlooked.

For people who service their car regularly, part of our comprehensive vehicle service inspection involves monitoring the transmission fluid level and quality, so we can advise when specific transmission servicing is required. For other people who service their car irregularly or their transmission can often be overlooked.

How often should you book a transmission service?

Many modern transmissions do not have a specified schedule for transmission servicing, with many quoted as ‘filled for life’. The trouble we find is modern transmissions do still fail, even more so than earlier models and often at much higher expense – so certainly the transmission was filled for its life, but didn’t last the life of the vehicle. It’s a lot to do with the wear and tear on your transmission which creates millions of tiny abrasive metal particles that fall into the transmission oil. While improvements in modern fluids have made advancements, transmission fluid still oxidises, losing vital additive properties through its life and often at an extreme rate if subjected to higher heat such as experienced through stop start urban driving, or towing. This worn, contaminated oil creates havoc with the smooth running and fine tolerances of the transmission and if left for too long can eventually lead to the transmission failing.

It doesn’t matter whether you have an automatic or manual transmission, the same caution about having it checked on an annual basis applies.

Benefits of this type of service

One of the biggest benefits of servicing your transmission on a regular basis is that it prolongs the life of your car. It also helps to improve your car’s fuel economy and reduces the potential for expensive repairs in the future. So if you’re already finding problems with your transmission, it’s time to book it in for a check, ASAP.

Signs of transmission trouble

There are plenty of signs that your transmission needs a service, from slipping between gears, odd timing of gear shifts, shudders, smells or fluid leaks. In other words, if your transmission isn’t changing gears smoothly or it’s making any odd noises, then it needs to be inspected quickly.

Some of the signs that can indicate a problem with your transmission include:

  • Weird smells
  • Strange sounds
  • Delayed shifting
  • Leaking fluid
  • Non-engaging gears
  • Shaking during gear shifts
  • Slipping gears
  • Check engine light or another warning light is on

If you’re experiencing any of these problems with your car, it’s time to get it checked out!

What’s included in this type of service?

A transmission service at Steven Sorensen Mechanical is tailored to the many different styles of transmission available today:

The differences between a manual, automatic, Continuously Variable Transmission (CVT) or Dual Clutch Transmission (DCT) call for completely different processes in how they are serviced.

For the traditional automatic transmission, most modern versions of this style have a strainer inbuilt rather than a true filter. For this reason, the older style of servicing where the transmission pan is removed to drain a portion of the fluid and change the ‘filter’, is often not the best way to service a modern transmission. Over ¾ of the fluid in your automatic transmission is held in the valve body and torque converter, not the pan, so by removing the pan you are only changing ¼ of the transmission fluid.

What’s a transmission flush?

A much more effective way of carrying out a full transmission fluid change is by using a transmission flush machine, which you can read about our process here – https://stevesorensenmechanical.com.au/services/automatic-transmission-servicing/

There are certain transmissions and issues where dropping the pan may be a more reasonable way to address that specific transmission, but typically this is when addressing a particular issue, and is not the norm on a modern transmission.

Although sold as an ‘automatic transmission’ to avoid confusion to the public when buying a car, the majority of modern cars are now fitted with a Continuously Variable Transmission (CVT) or Dual Clutch Transmission (DCT), and each manufacturers versions of these transmissions have specific manufacturer instructions on how to carry out servicing on that specific model, which we of course follow. Unlike an automatic transmission, CVT’s and DCT’s are examples where flushing would not be the preferred servicing method.

Book a transmission service today!

At Steve Sorensen Mechanical, we offer a fast and efficient transmission service to our clients in Browns Plains. We guarantee all our work and look forward to booking you in for a timely service. Call us on 3809 2711 and book your transmission service today.

Need a great mechanic near me

You may be thinking, I wish I had a great mechanic near me.

At Steve Sorensen Mechanical, we pride ourselves on providing great old fashioned customer service while working on the latest generation vehicles with the equipment to safely maintain your warranty.

By constantly investing in new equipment, and staying up to date with a regular training schedule for all our qualified technicians, you can be safe knowing –  I have found a great mechanic near me.

As a family business based in this area for decades, we aim provide the kind of customer service that you deserve, and provide transparent repairs, aiming to help you learn how your modern car works, and how you can maintain it correctly.

We don’t just see this as a job, but embrace the industry as a lifestyle, with our staff being regular contributors to industry technical magazines, and touring our own training courses for other workshops around Australia and New Zealand.

Drop in, call us on 3809 2711, email at sales@ssmech.com.au, or drop us a message on facebook, and let us give you the opportunity to tell your friends that “I have found a great mechanic near me”.

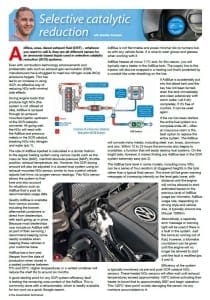
Selective Catalytic Reduction SCR – Adblue

Adblue Systems


CLICK HERE TO VIEW THE PDF MAGAZINE ARTICLE WITH IMAGES

magazine 1


Selective Catalytic Reduction

AdBlue, Urea, Diesel Exhaust Fluid (DEF), whatever you want to call it, they are all different names for an ammonia based liquid used in Selective Catalytic Reduction (SCR) Systems.

Even with combustion technology advancements, and problematic aids like EGR, manufacturers still struggled to meet low Nitrogen Oxides (NOx) emissions targets; so saw the increase in using SCR – an effective way of reducing NOx, with minimal side effects.

During engine loads producing high NOx (the system is not utilised at idle), AdBlue is sprayed through an exhaust mounted injector upstream of a SCR catalytic converter.  All going well, the NOx will react with the AdBlue and precious metals in the SCR catalyst, breaking NOx into nitrogen and water.

The rate of AdBlue injected is calculated in a similar fashion to the regular fueling system, using various inputs such as MAF, MAP, throttle position, exhaust temperature etc.  However the SCR dosing amount will also be adjusted in a closed loop system using an exhaust mounted NOx Sensor – similar to how a petrol vehicle adjusts fuel trims via oxygen sensor readings.  This NOx sensor allows the system to fine tune and also account for situations like AdBlue that is past its recommended usage date.

Quality AdBlue is available from various sources, each going up in price, from the bowser, in aftermarket containers or direct from dealerships.  As most dealerships are now including AdBlue refill as part of their servicing, I would recommend you keep some readily available when keeping these vehicles in your customer base.

When stored in a sealed container between 5°C and 20°C, AdBlue has a 2 year lifespan from the date of production.  Higher temperatures or a vented container will see a shelf life of around 6 months. A good starting point for any SCR system efficiency fault is testing the remaining Urea content of the AdBlue, commonly done with a refractometer, readily available for low cost with a quick google search.

AdBlue is not flammable and poses little risk to humans, but as with any vehicle fluids, it is wise to wear gloves and glasses when working with it.

AdBlue freezes at -11°C, and for this reason you will typically see a heater In the AdBlue tank, but also the supply line to the injector wrapped in a heating coil, protected by a conduit-like outer sheathing on the line.

If AdBlue is accidentally put into the Diesel Tank, and the key has not been turned, drain the tank immediately and clean extensively with warm water. Let it dry completely. If it’s free of crystals, it can be used again.

If the car has been started, the entire fuel system is a complete write off and often an insurance claim is the best option to replace the entire system.  The AdBlue will start to corrode many metals like steel, iron, brass, aluminium & zinc.  Within 12-24hrs the ammonia also begins to crystallise, a function that will easily destroy fuel systems, but on the bright side makes finding any SCR system AdBlue leak extremely easy.

The AdBlue tank level in some models, such as many VW’s, can be a series of 4 resistors at staggered heights in the tank, rather than a typical float sensor.  The driver will be given increasing intensity warning messages as the level gets low, with distance until the engine will not be allowed to start estimated based on the level of AdBlue usage per kilometre previous.  AdBlue usage rate, depending on driving style and vehicle size, is typically around 1 Litre per 1000km.

Alternatively a separate error message or warning light will be used if there is a fault in the system, but just the same as running out of fluid, a kilometre countdown can be given until the engine will no longer be allowed to start until the fault is rectified.

Efficiency of the system is typically monitored via pre and post SCR catalyst NOx Sensors.  These heated NOx sensors will often wait until exhaust temps exceed approximately 140°C before activating their heater to achieve approximately 800° and begin operation.  This 140°C ‘dew point’ avoids damaging the sensor via any moisture accumulated on it.

NOx sensors can be expensive as they are typically sold complete with their own control module.  They often use SENT protocol – communication via data packets – and as such efficiency of the system is generally best analysed via scan tool.  True to logic, while the system is operating correctly, NOx Parts Per Million (PPM), should have a lower reading on the Post Catalyst NOx sensor compared to the Pre Catalyst NOx sensor while AdBlue is being injected.  Many manufacturers’ scan tools now include a functional test which will run the system while analysing these pre and post signals and simply give a pass or fail result.

Later model SCR systems combine the DPF and SCR catalyst in one unit, and can even perform system efficiency evaluation using just one Pre Catalyst NOx sensor, with the aid of the low pressure EGR system exhaust flap as discussed in my Issue 61 article ‘Hybrid EGR’ (available via the www.tat.net.au search bar).

These clever single NOx sensor systems will periodically close the exhaust flap on decelerations over 4 seconds, sealing any exhaust from exiting.  The exhaust gas is fed back through the engine via the EGR system, while AdBlue is being injected.  As the exhaust gas passes through the engine (which is basically a non-combusting air-pump during deceleration), the Pre Catalyst NOx sensor can report the drop in NOx levels compared to the seconds before to determine if the SCR system is working correctly.

Furthermore, ‘Twin Dosing’ systems were recently introduced. As ideal NOx conversion rates in SCR occur between 220°C and 350°C, having just one injector and SCR catalyst at one point in the exhaust does not always give the optimum position for different engine loads.  With Twin Dosing, the first AdBlue injector and SCR catalyst mounted close to the turbo outlet is used during low speed/low exhaust gas temperature loads.  During high speed motorway driving, or fully loaded/towing, temperatures close to the turbo will well exceed 350°C, so the 1st AdBlue injector is no longer used, but a second AdBlue injector further down the exhaust stream in the ideal temperature zone is operated, utilising its own downstream SCR catalyst.

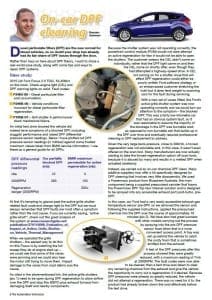
On-car DPF Cleaning

Focus on DPF On-car cleaning

CLICK HERE TO VIEW THE PDF MAGAZINE ARTICLE WITH PICTURES HERE

MAGAZINE


Diesel Particulate Filters (DPF) are now the new normal for Diesel vehicles, so no doubt your shop has had its fair share of DPF issues through the door by now.

In this article rather than harp on the theory of DPF’s, I want to share a real case study, along with some tips and ways to repair DPF systems.

Case Study

2015 LW Ford Focus 2.0 – 53,456km – Check Engine Light (CEL), DPF warning light on solid

P2463-00 | Diesel Particulate Filter – Soot Accumulation

P246B-00 | Vehicle Conditions Incorrect for Diesel Particulate Filter Regeneration.

P165B-07 | Grill Shutter A Performance /Stuck. Mechanical Failure

On our first test drive, the vehicle did have symptoms of a blocked DPF – sluggish performance and raised DPF differential pressure sensor readings.  Below I have plotted our DPF pressure sensor readings (in mbar) against some trusted maximum values taken from BMW service information that I use as a general guide on all DPF’s.


DPF Differential Pressure Readings

Our partially blocked DPF

(mbar)

BMW Maximum permissible for Active Regen (mbar)
Idle 22 3
2000rpm 283 150
Regeneration Danger (2000rpm) 300+


At first you may glance past the Active Grille Shutter related fault code and charge right to the DPF, but you remember that DPF faults are most often a symptom, not the root cause.  If you are currently saying, “Active Grille what?”, a great analysis of the system can be found at:

https://www.researchgate.net/publication/276116569_Evaluation_of_Impact_of_Active_Grille_Shutter_on_Vehicle_Thermal_Management

Operating the grille shutters – easiest option on this model is watching the full sweep they will do at engine start-up – we could see that some of the vanes would jam, while the motor could be heard still trying to move them.  Impact damage to the vanes from road debris was the cause.

As cited in the aforementioned research link, the Active Grille Shutters are required to be open during DPF regeneration to allow airflow over the DPF, avoiding this 600°C+ exhaust furnace from damaging itself and nearby components.  Since the shutter system was not operating correctly, the PCM would not dare attempt an Active Regeneration for fear it would not be able to open the shutters.  The customer swears the CEL didn’t come on individually, rather that the DPF light came on, and then the CEL as well shortly after, even though they had attempted a highway speed drive.  The fact a CEL wouldn’t come on for a shutter issue that will effect DPF regeneration may be poorly written Ford software strategy or an embarrassed customer stretching the truth, but it does give weight to scanning cars for fault during servicing.

With a new set of vanes fit, the Active Grille Shutter system was now operating correctly and we could turn our attention to the symptom – the blocked DPF.  This is a fairly low km car that had an obvious system fault, so it is reasonable to assume the majority of the blockage in the DPF is burnable soot, as opposed to non-burnable ash which will build up in the DPF over time and eventually require professional cleaning or replacement of the DPF.

Given the very large backpressure, close to 300mbar, a forced regeneration would not be advisable, and in this case it wasn’t even offered on the scantool.  Many manufacturers are actually now starting to take the forced regeneration option off the scantool as it is abused by many and when actuated carelessly will result in melted DPF’s.

Instead, we carried out an on-car chemical DPF clean.  Many additive suppliers now offer a kit specifically designed for cleaning of the DPF with very little disassembly required.  We were using a Powermaxx product from Bluechem Australia, with the main component being a supplied pressurised canister which foams the Powermaxx DPF Top Gun Cleaner solution, designed to be sprayed into any accessible exhaust port post turbo, pre DPF.

In this case, our Ford had a very easily accessible exhaust gas temp sensor pre DPF, so we removed the sensor and, following the supplied instructions, applied the pressurised chemical into the DPF over the course of approximately 10 minutes.  We have also had great success on other models carrying out the process by spraying into the pre DPF pressure sensor hose, when it is a more convenient access point.

A tray was set up behind the vehicle, catching the sooty foam that you will sometimes emit from the exhaust.

After the process, the DPF pressures were greatly reduced, with a maximum reading at 2000RPM of 7mbar.

The fault codes were able to be cleared and a test drive was taken to clear any remaining chemical from the exhaust, and give the vehicle the opportunity to carry out a regeneration if it desired.  As DPF pressures were already reduced so greatly, the vehicle was happy and did not attempt regeneration, there was no need for it to, the product had already broken down the soot effectively even before the test drive.

This on-car cleaning process has worked well for us on a range of vehicles, with most requiring it after a split induction hose has caused large blockage, such as the Holden Captiva which often arrives in reduced power (limp) mode, with a soot reading of 200% due to the common intake hose split underneath the battery.

These chemicals offer a cost-effective, safe way to restore DPF’s back to service, however there are certainly situations when it is not applicable, such as:

  • A vehicle with a high ash reading. Ash loading is a theoretical calculated number, as ash will build in the DPF during normal use, and cannot be burnt out.  Removal of ash requires off-car cleaning methods or replacement of the DPF.  Some manufacturers will bring on a warning and fault code once an ash limit has been reached, with many providing the number in their service information – eg. From Erwin, 2011 VW Amarok 2.0L, Limit for changing DPF = 175ml.
  • A vehicle with DPF blockage due to melting of the DPF substrate, often caused by a forced regeneration at excessive soot levels (often a result of tricks like bypassing built-in safety guards by deceiving the ECU by bleeding off some of the pressure in the differential pressure sensor hose so the ECU sees lower pressure and allows a forced regen).
  • DPF plausibility fault codes can be set due to a DPF that flows too well – by monitoring for at least some backpressure, or sometimes for temperature change across the DPF during regeneration, these codes stop people fitting a straight DPF delete pipe, but can also pick up faults like internally cracked DPF’s.


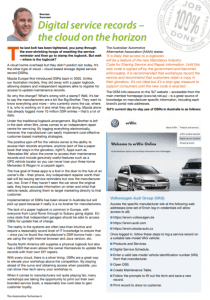
Digital Service Records

Many manufacturers have ditched the humble glovebox service book, moving towards online-based digital service records.

View the PDF article by clicking the image below

Digital Service Records Article

Digital Service Records Article


The last bolt has been tightened, you jump through the ever shrinking hoops of resetting the service reminder and go to stamp the logbook – but wait, where is the logbook?

A cloud looms overhead, but they didn’t predict rain today, it’s the other type of cloud – Cloud based storage Digital Service Records (DSR).

Way back in 2005 it was Mazda Europe that first introduced the Digital Service Record.  Unlike our Australian models, they did away with a paper logbook, allowing dealers and independent repairers alike to register for access to update records of maintenance.

Why the change, what’s wrong with a stamp?

Consider the manufacturer as ‘Big Brother’ – they want to know everything and more – who currently owns the car, where it is, who is working on it and what they are doing.  Mazda alone have currently logged over 10 million DSR entries – that’s a lot of data.

When Mrs Jones comes to an independent repair centre for servicing, Big Brother is left in the dark.  By logging everything electronically, the manufacturer can easily implement cost-effective customer based marketing strategies.

The spin off for the vehicle owner is the ability to access their records anywhere, anytime (sort of like a paper book that stays in the glovebox right?).  Apps like ‘Mercedes Me’ allow the owner to access their maintenance records, along with a whole host of genuinely useful features like a GPS vehicle locator so you can never lose your 3 ton Mercedes G Wagon in a carpark again.

The true goal of these apps is a foot in the door to the hub of an owner’s life – their phone.  Any independent repairer worth their salt will be issuing service reminders, but now the manufacturer can too.  Even if they haven’t seen the car since sale, they have accurate information on when and what that vehicle needs, to target marketing directly to that customer.

Implementation of Digital Service Records has been slower in Australia, but it will pick up pace as it really is a no brainer for manufacturers.

The lack of paper logbook is commonplace in Europe, with everyone from Land Rover through to Subaru going digital.  EU rules state that electronic service records should be accessible for update by independent garages, free of charge.  The reality is, the systems are often less than intuitive and require a reasonably sound level of IT knowledge to ensure that once you’ve found the manufacturers’ DSR burrow hole you are using the right internet browser and Java version etc.

Toyota North America still supply a physical logbook, but also have a DSR which even allows the owner themselves to update with DIY repairs at home.

With every cloud, there is a silver lining.  This is a great way to elevate your workshop from the competition.  By staying ahead of the curve and obtaining access when possible, you show how tech savvy your workshop is.

For the manufacturer’s not quite playing fair, many workshops are taking the opportunity to print out their own branded service book, a reasonably low cost idea to gain customer loyalty.

The AAAA states – ‘it is likely that access to eLogbooks will be a feature of the new Mandatory Industry Code for Sharing Service and Repair information.  Until this new code is signed off by the government and becomes enforceable, it is recommended that workshops record the service and recommend that customers retain a copy in their glovebox. It’s not ideal, but it’s a stop gap measure to support consumers until the new Code is enacted.’

The TaT website OEM info resource, accessible from the main member homepage – www.tat.net.au – is a great source of knowledge on manufacturer specific information, including their portal web addresses.

TaT’s current day to day use of DSR in Australia is as follows:

Volkswagen Audi Group

Access the specific manufacturer site (One set of Erwin login credentials will allow access to all) –

https://erwin.volkswagen.de

https://erwin.audi.com

https://erwin.skoda-auto.cz

Once logged in follow these steps to log a service record on a suitable late model VAG vehicle:

  • Products and Services
  • Digital Service Schedule
  • Enter a valid late model VIN from that manufacturer
  • Open DSS
  • Create Maintenance Table
  • Follow the prompts to fill out the form and save a new record
  • Print record to show to customer


BMW/MINI

https://aos.bmwgroup.com

Last year we posted a video walking through the whole process of logging a BWM DSR –

On www.tat.net.au enter BMW AOS into the search bar

Or search BMW on The Automotive Technician Youtube page

BMW has since changed the registration options – if you choose independent repairer, you will notice Australia is not listed. Choose, User Group -> Other (Please justify your request), Australia will now be available in the Country dropdown box, you can then carry on registration from there.

It should be noted that updating the AOS site will update the DSR, but won’t instantly update the service history that is viewable in the in-car centre screen menu – this in-car data can however be updated by a select few scan tools such as Autologic.


Jaguar Land Rover

Although we have first-hand knowledge of a handful of independents obtaining registration in Australia, attempts last year and recently have resulted in futile email responses ending with ‘In the Australian market, we do not have Block Exemption like in Europe so we do not give anyone access’.  Where does this leave the customer?  We have lodged several incidences of these email trails with the AAAA and we recommend you do the same.

The reality is that Digital Service Records can be expected to creep in as the norm, and together as independents we need to be ahead of the curve before it becomes another reason for a customer to prefer visiting the dealer.  It may seem cumbersome and over the top compared to a logbook, but there are real benefits for all parties involved, providing we stick to our guns to obtain fair access, and charge accordingly for the extra time spent on each service, just as the dealers do.

We encourage you to direct any difficulties you have in access that affects your ability to provide a complete logbook service for your customer to info@aaaa.com.au, to continue the gathering of data in the Right To Repair campaign.

Covid 19 Measures

Dear Steve Sorensen Mechanical Customers,

As we all work our way through the COVID-19 Pandemic, we wanted to take this opportunity to write to you with an update on our business, how we are adapting to the changes enforced by authorities and ensuring the safety of our customers, staff and the broader community.

We are passionate about the service that we offer to the community and we will be continuing to service our customers with as little impact as possible.

Below we have created a list outlining the additional hygiene measures that we are currently implementing:

✅ All of our technicians will wear fresh gloves prior to disinfecting your vehicle.

✅ All vehicles will have contact areas disinfected before and after work – including door handles, steering wheel, seatbelt, indicator stalks, gear selectors, handbrake lever etc.

✅ All technicians will wear gloves while working on your vehicle.

✅ All technicians will maintain personal hygiene between jobs by washing and sanitising their hands thoroughly.

✅ Our office staff will be carrying out a routine cleaning schedule as well as immediately disinfecting any contact areas.

✅ All payments can be made through many contactless or electronic methods.

✅ We will be maintaining social distancing as per federal guidelines

We are also offering extra Customer Support including:

✅ Pick up and drop off service if you cannot or do not wish to leave your home.

✅ The use of key pick up and drop off slots.


If you would like to learn more about the precautions that Steve Sorensen Mechanical is taking or would like to arrange a booking, please get in touch with us by calling 07 3809 2711.

Steve Sorenson Mechanical Facebook Posts 01 1


Advanced Driver Assist Systems – ADAS

– FOR BEST VIEWING, CLICK HERE FOR THE PDF MAGAZINE ARTICLE –Advanced Driver Assistance Systems – ADAS

PIC 1

When faced with today’s seemingly endless
barrage of new technology, sometimes
you need to pick your battles. This means
researching which emerging technologies provide a
business opportunity to dive head-first into and which
ones should be waited and watched on as you gather your
troops.
Advanced driver-assist system (ADAS) technology is currently
the buzz-talk in overseas repair markets. In this article I hope to
increase talk of it here in Australia and get you thinking about the
battle ahead.
Features such as the anti-lock braking system (ABS) and
electronic stability control (ESC) have now become mandatory
and these more advanced driver-assist systems – which are
already rolling out as selling features on higher spec models – are
headed the same way.
You likely already have ADAS-equipped vehicles coming into your
workshop for routine oil changes and repairs, sometimes without
you even knowing of the technology that lurks beneath.
People are driving cars equipped with ADAS technology and do
not understand or know what is going on with their vehicle. This
is leading to driveability complaints that are actually just part of
normal operation.
We’ve lived through this all before – who hasn’t experienced a
customer complaining about the brake pedal pulsing and making
a weird noise when they brake hard in the wet? We see this as an
opportunity to educate them that the ABS is operating as it should
and it should be the same with ADAS.
Even if you don’t plan to dive into ADAS calibration – and, hey,
I wouldn’t blame you at this early stage – it’s important to start
preparing. A fundamental
knowledge of the system
will give you the confidence
to help educate that
customer who never
indicates their lane changes
and is now complaining
about their haptic-feedback
steering wheel shaking
occasionally.
ADAS is touching almost
every module of the
modern car and this article
would be a novel if we
were to discuss each and
every system at length.
To brush up on your
base-level knowledge,
go to www.wikipedia.org/
wiki/Advanced_driverassistance_systems. Here you’ll find an easy-to-digest and
comprehensive list of current ADAS systems, with links to listed
items that will give you a basic knowledge of the system and
manufacturer-specific acronyms and nuances. It’s the perfect start
to your research.
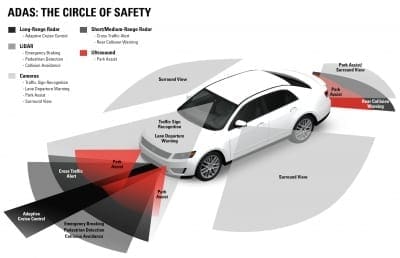
ADAS technology relies on components uncommon to the general
workshop and these all need to be understood. Along with
cameras, one of the most commonly used technologies is radiodetection and ranging, which we all know as radar.
This sends out radio waves
and uses the returning
frequencies to measure and
map out surrounding objects
and landscapes.
Most manufacturers are putting their research and development
dollars into light-detection and ranging (LIDAR) technology,
which uses invisible lasers to build a digital image that is then
interpreted by the vehicle’s artificial intelligence (AI).
One of the biggest advantages of LIDAR is the ability of its
sensors to create an incredibly precise image, offering accuracy
within a few centimetres even at long distances. This makes
it useful for pedestrian-detection systems, collision-warning
systems and cross-traffic alert technology.
LIDAR, however, doesn’t work quite so well in the case of
closer objects or in the rain, snow or fog, so radar, ultrasound,
cameras and thermal imaging will all play a part in ADAS and the
progression to autonomous vehicles.
Tesla’s Elon Musk, as ever against the grain, has branded LIDAR
a ‘fool’s errand’, saying anyone relying on the technology will be
‘doomed’.
Deeper investigation shows heavy-hitting researchers such as
Cornell University agree with his vision of a LIDAR-less ADAS
future, saying they have achieved LIDAR-like resolution using
multiple cameras.
Many manufacturers are
fumbling their way through
the implementation of
ADAS and mandating
repairs in a learning-onthe-run fashion. My advice
for the general workshop,
however, would be to wait,
watch and prepare.
Start your training and
research on this technology
but to be profitable in this
sector and recoup your
investment as an ADAS
calibration shop the bulk
of your entire workload
needs to ADAS calibrations,
mainly for trade customers.
While I’m sure tech-savvy
TaT members such as
yourself are capable of performing the necessary diagnostics and
calibrations on these systems, the price of targets and equipment
– which usually differ from manufacturer to manufacturer and
are often run up to the tens of thousands of dollars – is a limiting
factor.
Many aftermarket targets and scan-tool functionalities are
becoming available in this area but they also open a can of
worms about liability in the event of an accident.
2 3
1
Various components perform specific
jobs in your common ADAS system.
The bracket was bent back for
diagnostic purposes. Proper
repair required a new bracket and
recalibration of the radar using
specific targets.
Physical faults are common.
This bracket for the forward radar
is badly bent, causing a warning
message and disabling the intelligent
cruise control (ICC) system.
The Automotive Technician 9
You can achieve an incorrect calibration with an OEM scan tool
and an OEM target, and proper calibration with an aftermarket
tool and target – and vice versa. More important factors in the
successful repair of these technologies are the technician reading
and following the proper service information, and their attention to
detail.
With ADAS the industry now
faces a large challenge to
become competent at many of
the basic services it’s performed
for decades, from alignments
and brake servicing to steering
and suspension repair. Correct
operation of ADAS technology
assumes that all of these
fundamental systems are in
factory working order – the lack
of accuracy from less than perfect
workmanship or aftermarket parts
that was once tolerated won’t slide
with these systems.
Many modern technicians are relying on what has got them by
before – experience-based information. You punch out a quick
Facebook post saying ‘Hey, have you aligned this Honda radar
before?’. Someone responds, ‘Sure mate, draw some squares on
some paper and mount it about waist height three steps in front
of the car, that got the light out for me.’. That kind of scenario just
isn’t going to fly on these future vehicles.
A misaligned ADAS system may well still appear to function but
is akin to a drunk driver not seeing straight. You need to be fine
telling a customer, ‘No, I don’t have the tooling to complete this
repair safely’ or subcontracting the calibrations out to an ADAS
specialty shop or dealer.
At this early stage this technology has an inherent conflict. On
one hand, if you are able to complete the repair, you can charge
accordingly and word will spread that you are the high-tech shop
in town. But if procedures are not followed and completed to exact
specifications, you may find yourself liable for serious property
damage or personal injury in the event of an accident.
The main gamechanger we
should all be hoping for before
ADAS calibration becomes truly
mainstream is the introduction
of industry standards across
manufacturers, much like the
mandate of the OBDII diagnostic
connector compared to OBD1 and
prior systems.
The ongoing push for factory
service information – which we are
making inroads on thanks to the
‘Right To Repair’ work of industry
groups such as the Australian
Automotive Aftermarket Association
(AAAA) and Automotive Repairers Council of Australia (ARCA) –
will become an absolute necessity rather than just a convenience.
I urge you to utilise the great resources of aftermarket data
suppliers such as Autodata. They have vast libraries beyond
what you see online, and have always been happy to dig up
relevant vehicle data whenever I’ve made the call to them. Online
resources such as www.diag.net offer education and discussion
on high-level subjects such as ADAS. There are also training
opportunities to take advantage of – Bosch, for one, runs an
ADAS training course, which you’ll find listed on our training page
near the back of the magazine.

Holden Cruze Oil in Coolant

Due to the high number of Holden Cruze vehicles that we see through the shop, we get to know some of the pattern failures and the most economical way for you to repair them.

The Holden Cruze F18 engine has a common failure point of the seals in the oil cooler failing and allowing oil to mix into the cooling system.

You can view a video we have done on the failure and repair here:

We keep a keen eye for any oil in the cooling system during servicing to ensure it can be repaired before any further damage occurs – or even better, we recommend replacing these oil cooler seals periodically to completely avoid the need for any other oil damaged cooling system parts.

As the extent of the work required depends greatly on how much oil is in the system and how long it has been left to deteriorate any rubber components, you are best to contact us to walk through a price estimate of your specific situation.

So if you are looking for a mechanic who knows your Holden Cruze front to back and can take care of the oil in coolant problem before it even arises, contact us today on 3809 2711.

Diesel Hybrid Exhaust Gas Recirculation (EGR) Systems

Hybrid EGR – View the Magazine PDF File Here


Diesel Hybrid Exhaust Gas Recirculation Systems

Whichever side of the fence you’re on, it is clear that emissions is an increasingly dirty word, and internal combustion engines have the finger squarely pointed at them by lawmakers.

Near the top of the hit list is diesel (thanks VW Dieselgate).  With a modern diesel engine still relatively simple in design, it is the emissions management and after treatment systems bolted onto it that can resemble something from the Mars rover.

One such system, perhaps with the worst rap sheet of them all, is Exhaust Gas Recirculation (EGR), or as many forum goers will correct you, ‘The Antiperformance Valve’.  A valve with such bad intentions it has entire online shops dedicated to banishing it from existence with blanking plates and voltage modifiers.

Heck it’s got such a bad reputation there’s even old wives tales about it.

“Want the best bang for buck, get the blanking plate with a hole drilled in it” boasted Jim to Rob down the pub one Sunday, not knowing his mate Tom actually told him to drill a hole in the intake air throttle flap.  Tom knew on some models this could fool the computer into not cottoning on to the fact that air pressure and flow were not as it modelled when EGR was commanded, stopping that ‘annoying’ emissions light coming on.

Banter aside, the once primitive EGR system has gone through changes, and leads the way as one of the cheapest and most effective ways of reducing Nitrogen Oxide emissions.

This is good for anyone with a vested interest in diesel, because it is my belief that expensive after treatment systems will be what ultimately forces the market away from diesel.  The after treatment list grows by the day, with even the lowest of base models utilising expensive items such as the Diesel Oxidisation Catalyst (DOC), NOx Storage Catalyst (NSC), Diesel Particulate Filter (DPF) and Selective Catalytic Reduction (SCR, in layman’s terms – Exhaust fluid injection).

So how is our soot depositing, intake blocking, code setting enemy, EGR, improving to help keep diesel purchase reasonably priced for consumers?

EGR Advancements

The regular EGR system we are all used to, is commonly referred to as High Pressure EGR (HP EGR), or sometimes referred to as Short Route EGR.  This utilises exhaust gas in the exhaust manifold, before the turbine, routed into the intake manifold, after the turbo compressor.

Increasingly becoming the norm, are systems referred to as Hybrid EGR.  These keep the benefits of High Pressure EGR, as well as adding in a Low Pressure EGR (LP EGR) system, sometimes referred to as Long Route EGR.

Low pressure EGR takes exhaust gas from further downstream of the turbine, often after a DPF, routing it into the intake stream, before the turbo compressor. Each system, HP EGR and LP EGR, has different pros and cons, hence each is operated during different load situations in a Hybrid EGR system, sometimes even with both operating at the same time.


  Advantages Drawback
High Pressure EGR ·  Fast EGR response time

·  Turbo compressor efficiency and durability

·  Unstable EGR cylinder distribution

·  Soot deposits through system

·  Hotter EGR

·  Reduce turbine wheel response

     
Low Pressure EGR ·  Equal EGR cylinder distribution

·  Clean EGR (after DPF)

·  Highly cooled EGR

·  Improved turbine wheel response

·  Slow EGR response time

·  Turbo compressor efficiency and durability

·  Increased compressor size


Let’s take a look at these points a little closer –

Response time

Best thought of as ‘EGR lag’.  HP EGR can have a valve mounted directly on the intake manifold, so when it opens, exhaust gas reaches the cylinders quickly.  LP EGR requires exhaust gas to travel the entire length of intake plumbing before its result is achieved.  This long path does however improve equal cylinder distribution in the LP EGR system.


Soot Deposits

As LP EGR can use exhaust gas after the DPF, it is close to being soot free.  This gas does need to pass through the turbo compressor, so often for safety a filter will be incorporated in the LP EGR cooler to eliminate any possible soot particles.  This is something to consider when purchasing aftermarket coolers.


Turbo compressor efficiency

LP EGR allows all exhaust gas to travel through the turbine, allowing quicker turbo response than a HP EGR system which bleeds precious exhaust energy before the turbine.  Conversely, in a LP EGR system we now have fresh air and exhaust gas passing through the turbo inlet compressor, meaning a larger turbo is required to handle this larger amount of gas.

This larger amount of gas flow in LP EGR is particularly useful at low speed, high and low load points, where traditionally EGR rates are high but overall air flow is low. The operating point of the Variable Nozzle Turbo can be moved to an area of higher efficiency, increasing fuel economy and decreasing compressor surge while decreasing NOx and soot.

In high speed, high load points, HP EGR gradually decreases the difference between exhaust and intake pressures, even lower than LP EGR, so HP EGR becomes the better option for the trade-off relationship between fuel economy, NOx and soot.

Throughout the midrange and steady states, a combination of HP EGR and LP EGR can be used.


Turbo compressor durability

With the turbo compressor wheel living most of its life well over 100,000 rpm, routing exhaust gas through it is a tricky proposition.  Particular attention is paid to the EGR cooler in a LP EGR system, as any water droplets formed from condensation as the hot exhaust gas pass through the cooler could be disastrous. Often an EGR cooler bypass valve will be utilised to prevent hot exhaust gas passing through a dead cold cooler as the vehicle warms up.

Exhaust gas can also accelerate corrosion on the compressor wheel, therefore a special turbo designed to resist this must be used.


Both LP and HP EGR systems require forms of throttling air to create pressure differential, for the exhaust gas to find its way back into the intake stream –

  • Variable Nozzle Turbo (VNT) – The variables nozzles of the turbo are a key aspect in manipulating exhaust backpressure throughout the load range. It is able to create higher exhaust manifold pressure than intake pressure, allowing exhaust gas to flow into the intake manifold.
  • Intake air throttle valve – When load situations mean it is not reasonable to use just the VNT to create high exhaust pressure, this valve reduces the intake manifold opening, reducing intake manifold pressure, allowing exhaust gas to flow into the intake manifold. A secondary function of this valve is the closing on engine shut down for smoothness and to prevent an emergency diesel runaway situation.
  • Exhaust air throttle valve – Usually located downstream of the DPF, this is the preferred method of creating exhaust backpressure in a LP EGR system to drive exhaust gas into the intake piping.

Less common in current passenger vehicles –

  • EGR pump – A less fuel efficient option on a LP EGR system is using an EGR pump, downstream of the DPF, either electrically or crankshaft driven, to pump EGR gas towards the intake.
  • Turbo compounding – Common in trucking, a separate turbine is added after the turbocharger’s turbine. This increases EGR flow by increasing exhaust backpressure. To recover some of this energy lost through pumping losses, the added turbine transmits to the crankshaft through a transmission.
  • Reed valve (one-way valve) – As exhaust pulses come in peaks and valleys, the use of a reed valve can allow exhaust gas to flow into the intake during a peak, even though the average exhaust pressure is below intake pressure, which would otherwise to be too low to drive flow.
  • Fast rotating valves – Mahle has developed a component named – Rotating fast-switching charge air valve (SLV-R). Similar in concept to a reed valve, this is best thought of as an electrically powered whirly bird, installed in the intake stream, creating intake air pressure peaks and valleys as it continually spins.

As you can see, great effort is used to get exhaust gas back into the intake, so as ‘EGR Performance’, ‘EGR Flow’ and ‘NOx level exceeded’ codes become more and more common it is important to consider the whole system and how it works in unity rather than focusing on the actual EGR valve itself.

The Engine Control Module, is often watching Mass Air Flow (MAF) and Manifold Absolute Pressure (MAP) sensor readings to set these fault codes, particularly in systems that do not utilise a position sensor on the EGR valve.  Obtaining the correct manufacturer code setting parameters can be the key to faster diagnosis.

I find TaT’s ‘Good scan/scope data’ section (accessed from the TaT homepage) a great resource when diagnosing EGR flow problems.  I’ll often jot out a table of RPM, MAF, and EGR command to compare my problem vehicle with known good readings.  This gives great direction for possible system blockages, so you can recommend physical pull apart of the system to the customer with confidence.

Be forewarned though with this method to ensure all other parameters are equal when making your table.  As I hope I’ve demonstrated, modern EGR command is a complex dance between engine temperature, load, HP EGR and LP EGR systems – so you want to ensure you are comparing apples with apples.

Signs you might be heading for costly brake repairs

It has happened to most of us – the brake light switches on and we see the dollar signs in front of our eyes! Brake repairs can be very expensive, so if your brake light switches on, you always need to have it checked by an experienced mechanic.

If the brakes feel spongy when the light is lit, it’s safer to pull over and have your car towed to your mechanic, otherwise you can probably drive to yourself to your mechanic. If luck is on your side, it’s just a fault sensor switch, but if you are out of luck, it could be the first sign of a big problem. Keeping an eye open for any indications that there might be problems with your brakes is not only good for your safety, but it’s also good for your hip pocket!

So if you want to avoid a costly car brake service on your vehicle, here are three signs that you need to recognise and have checked by your mechanic.

  1. Pulling to one side: If your car tends to pull to one side when you depress the brake pedal, it’s likely that there is a problem with one or other of your front brakes. You might not notice it until you hit the brakes suddenly, but if it does occur, then your vehicle needs to be booked in for brake repairs as quickly as possible.
  2. Noisy brakes: Grinding, squealing or scraping noises when you depress the brakes means that either your brake pads need to be replaced or that they are so worn that they are starting to wear the rotors or discs. At this point, you need to call your mechanic and book in for brake repairs, hoping that it’s just the brake pads and not anything worse.
  3. Spongy brakes: When your brakes feel spongy or you need a lot more pressure to engage your brakes than normal, the hydraulic brake fluid could be leaking. This is a big safety problem, because without the pressurised hydraulic fluid, your brakes won’t work. Don’t waste any time thinking about it, just book your car in with your local mechanic ASAP.

For a quality Car Brake Service by experienced mechanics in Browns Plains, call Steve Sorensen Mechanical on 07 3809 2711 or send us an email.


What’s the difference between 4WD and AWD?

As an automobile mechanic shop in Browns Plains, we frequently service and repair both 4WD and AWD vehicles, but do you know the difference between these two types of vehicles? Many people think that these terms are interchangeable and simply describe the same type of vehicle, but they would be wrong.

What is a 4WD?

A 4WD (four wheel drive) vehicle is designed for off-road driving, because it can engage all four wheels to provide the extra traction needed to safely navigate difficult terrain. Corrugated dirt roads, gullies, low rivers, sand dunes and beaches can all be overcome with a good 4WD vehicle. Add in tyres designed for rough terrain, a bull-bar, lifters and all the necessary odds and ends so loved by 4WD enthusiasts and you have the makings of an awesome trip out bush.

These vehicles don’t operate in 4WD all the time, you have to select this option, but when you do the power is divided between the front and rear axles. However, this can cause your wheels to spin, so to avoid this problem the power isn’t evenly spread between the inside and outside wheels resulting in a maximum turning ability without spinning your wheels. Why not bring your 4WD into our automobile mechanic shop for its next service or repairs?

What is an AWD?

An AWD (all wheel drive) vehicle has a slip differential that lets it drive all four wheels at the same time with a rotational difference between the front and rear axles. So it’s similar to a 4WD, but it’s engaged all the time and is great for driving in wet slippery conditions where extra traction is necessary. It achieves this additional torque because AWDs are usually computer driven with sensors on each wheel that monitor both traction and speed, identifying which wheel needs more torque.

If you are intending to go off-road then you really need a 4WD, as it’s tougher than an AWD and can handle the rough terrain easily. If you don’t want to go off-road then an AWD will give you maximum traction all the time and since it’s engaged all the time, the AWD is also more fuel efficient than a 4WD.

To book a service or repair job for your 4WD or AWD with an experienced automobile mechanic in Browns Plains, call us on  07 3809 2711 or send us an email today.

Looking for car inspections and roadworthy certificates in Browns Plains?

If you own a car and are moving to Browns Plains (or anywhere in Queensland) from interstate, then your car needs a roadworthy certificate. Even if you have an equivalent certificate issued somewhere else in Australia, it doesn’t matter – you still need to book you car into an auto shop that is an approved inspection station and can issue these certificates.

Steve Sorensen Mechanical is an approved Vehicle Inspection station for roadworthy certificates in Browns Plains, you just need to make a booking with us and leave your car for a few hours. You will also need a roadworthy if you sell your car privately.

What’s involved in roadworthy certificates?

Once you have made a booking and dropped your car off with us at our Browns Plains auto shop, we will issue a roadworthy certificate if it passes the Queensland Government’s minimum safety standards checklist. If your vehicle fails this inspection, we will document the problems that need to be fixed on the form and make these repairs for you (with your permission), then issue the completed certificate to you.

If you prefer to have your vehicle repaired elsewhere, then that’s fine, but you won’t be issued a certificate until the repairs have been fixed. If you are moving from interstate, you must register your vehicle within 14 days in Queensland and to do that – you need a roadworthy certificate issued in Queensland (you can also apply for a partial refund of your inter-state registration). You will also need to take your car registration plates with you to a Transport and Motoring Customer Service Centre, along with your roadworthy certificate when you reregister your car in Queensland.

If you are caught by the police driving an unregistered vehicle, you will be fined. So it’s not something you can ignore (you will also need to get a Queensland driving licence).

At Steve Sorensen Mechanical in Browns Plains, we perform vehicle inspection and issue roadworthy certificates for anyone who is in this 14 day window, so just let us know when you make your booking. Call us on 07 3809 2711 or send us an email today.

From brake and clutch repairs to A/C and turbo issues – what are the most problematic cars?

Brake repairs and clutch repairs can be quite expensive, so wouldn’t it be great if you could predict whether your car may suffer from this type of problem in the future? Well, we might not have a crystal ball, but it’s fair to say that some cars suffer from particular problems more than other cars.

If you are buying a second hand car or your car is about to run out of its warranty, it might be best to have it checked over, particularly if it’s on the list below. So let’s take a look at some of the more common car problems and the cars that tend to have these issues, more than others.

  • Gearbox, brake repairs and clutch repairs: The most common problems are with gearboxes and the Volkswagen Golf and BMW 3 Series tend to come out on top for the most issues with their gearboxes. For brake repairs and clutch repairs on the other hand, the Volkswagen Passat, Land Rover Discovery and BMW 3 Series come out tops for problems with brakes, and the Ford Focus and Volkswagen Golf for clutch problems. As you can see, the Volkswagen Golf and the BMW 3 Series tick two of these boxes and a few others below as well, so it’s buyer beware!
  • Electrical problems: The second biggest problems are concerned with the electrics of vehicles, an issue that might increase rapidly as cars become more high-tech and reliant on computers. The main culprits for electrical problems are the BMW 3 Series and Audi A3.
  • Turbo issues: If you have a turbocharged car, then this is one of the last problems you want, so you need to be careful with the Ford Focus and BMW 3 Series.
  • Alternator problems: There’s not many car owners who haven’t had to replace an alternator, but owners of the Land Rover Discovery or the Ford Focus might be more familiar with this issue than most.
  • A/C issues: Most of us couldn’t function properly without A/C in our car, but problems with A/C condensers happen more frequently with the Volkswagen Golf and the Audi A4, than most other vehicles.

For all repairs, including brake repairs and clutch repairs, call Steve Sorensen Mechanical on 07 3809 2711 or send us an email.

Are the days of the automobile mechanic done and dusted?

With all the increases in auto technology, you might think that they days of the automobile mechanic will soon be over! Well, maybe in 100 years’ time, vehicles will be self repairing, but for the time being, we still need mechanics to diagnose and repair our vehicles.

It’s not a daft thought however, because if not for the grease on their overalls, often an automobile mechanic could easily be confused with a computer nerd, simply due to all the diagnostics they need to understand. Let’s have a look at some of the ways that technology might make the life of an automobile mechanic easier in the future or alternatively, more complex.

Self-diagnosis: It’s been done with laptops and PCs, where the computer can self-diagnose itself, so why not in cars, van and trucks? If you want to understand more about how this technology could work in the future and how to program computers to self diagnose themselves, check out Raspberry Pi, a tiny programmable computer that sells for around $25 and is designed to help people learn how to program computers.

Aluminium cars: Most vehicles, other than the really luxurious and expensive models, are made from steel, which is strong but very heavy. To make cars just as strong, but lighter on fuel, some manufacturers (Ford in particular) are considering changing to aluminium for their entire range. This means that an automobile mechanic who is experienced fixing steel body cars, will need the tools and the knowledge to fix aluminium cars as well.

Wireless software updates: Sometimes your car’s software is updated during a regular service, but with the increase in technology, there’s the possibility that this can be performed on the fly. These software updates help to increase the car’s performance or correct operating problems and one of Tesla’s new electric cars takes advantage of this new technology. One of the issues with wireless updates, however, is that car owners won’t need to drive to their automobile mechanic as often for updates or performance issues, potentially resulting in lost sales. On the other hand, it’s unlikely that your local mechanic will be out of work any time soon!

For high-tech diagnostics on all vehicle makes and models, call Steve Sorensen Mechanical on 07 3809 2711 or send us an email.

Signs that your vehicle needs brake & clutch repairs

None of us want to be faced with a raft of car problems, particularly when it means that we need brake & clutch repairs. Whilst these are not always very expensive to fix, they can be inconvenient, but the longer they are left, the greater the damage and the more costly the repairs.

So it pays to catch any problems with your brakes or clutch as soon as possible, before the damage increases and ends up costing you far more than you anticipated. Here are a few common indicators that you will need brake & clutch repairs sooner rather than later.

Signs of a bad clutch

Clutch problems can start out simply as poor performance, but can rapidly degenerate into problems getting into gear, vibrations or stiffness when the clutch is depressed, or even grinding sounds when in neutral or when trying to get into gear. If your car starts slowly but the engine seems to be racing, this is called clutch slippage and occurs usually when the disc is worn, but can also be due to a broken motor mount and a number of other issues.

If you have any of these problems, you will need to bring your car in for brake & clutch repairs and we will identify and fix the problem for you.

Signs of worn or damaged brakes

If you brake light switches on, then it’s likely that you need brake & clutch repairs, but you will need to bring it in for us to identify the exact cause of the problem. Some signs that you might also notice is that your car veers to the side or vibrates when you brake, or you might hear a screeching or grinding noise. The most likely problem is going to be your brake pads or your rotors, both of which we can fix at our Browns Plains workshop.     

At Steve Sorensen Mechanical, we can identify and repair brakes, as well as manual and automatic clutches, so if you need brake & clutch repairs, don’t hesitate to give us a call on 07 3809 2711 or send us an email.

Brake repairs and DIY checks before selling your car

When you are selling your car, everything needs to be in good working order, so if it needs brake repairs or any other problems fixed, it’s a good idea to sort these out before putting it on the market. To give you peace of mind, you can bring your car into us for a complete check-up before selling it, because we can make any repairs that are needed and issue you with a road safety certificate at the same time.

To save yourself some time and money however, there are a few simple checks that you can do yourself, before bringing your vehicle into our workshop, leaving the more complicated checks to our experienced mechanics on the day.

  • Check lights: Replace the bulbs on any lights that are not working (front and rear, side, brakes and indicators) and if this doesn’t fix the problem, we can trace the fault when you bring it in for brake repairs or for a roadworthy.
  • Check fluids: If you top up the brake, coolant, power steering and windscreen washer fluids then all we need to do is to check for leaks when you bring your vehicle in for its roadworthy.
  • Check tyres: Not many people will want to buy a car that needs new tyres, not unless it’s a bargain! So check the treads and make sure that all the tyres (including the spare) aren’t bulging or damaged and if in doubt, replace them at your first opportunity.
  • Check brakes: Take your car for a drive and pay attention to the brakes. Make sure that the brakes engage promptly and that there are no high pitched noises when you press on the brake pedal. If you think that you need brake repairs, for example new pads or rotors, it’s best to book in as soon as possible because problems with your brakes are a big safety issue. If we pick up these problems up during a roadworthy, they will have to be repaired before we can issue you with the certificate.

If you need brake repairs or roadworthy certificates in Logan, call Steve Sorensen Mechanical on 07 3809 2711 or send us an email.

What’s the biggest cause of brake and clutch repairs?

We all know that rush hour traffic is a serious pain, but did you know that it’s also one of the biggest causes automotive clutch repair? The freeways in Brisbane seem to resemble carparks more than freeways in the morning and afternoon peak hours, so at first it seems unlikely that they can lead to an increase in brake repairs.

The problem lies with all the stopping and starting that happens when you are crawling along the freeways. This constant on and off pressure on the brakes, not only leads to greater likelyhood of automotive clutch repair, but it can also affect the life of your tyres as well. If you regularly commute to work in the busy periods, we recommend that you book a car brake service as soon as possible, just to be on the safe side.

Driving in heavy, slow traffic that is constantly stopping and starting leads to problems with your brake lines, drive shaft and your tyres. Let’s look at each one of these in turn:

  1. Problems with brake lines: The brake lines transfer the brake fluid to the brake pads, keeping them lubricated and operating correctly. That’s why we always check and refill your brake fluid during a car brake service. Constantly stopping and starting all of the time, which happens in peak hour traffic, causes these brake lines to wear away, which if it isn’t caught soon enough, results in leakage of your brake fluid. Your brakes then fail and you have an even bigger problem on your hands!
  2. Problems with drive shaft: Unnecessary or constant braking cause the ball in the socket of the drive shaft to move and if this keeps happening, it can lead to your drive shaft wearing down. The first signs of a problem are vibrations in the car and loud noises, such as scraping, rattling or clunking sounds coming from underneath the car. The drive shaft transfers the torque from the engine to the wheels, so any problems need to be addressed immediately. It’s a good idea to have a car brake service at the same time as an inspection of your drive shaft, particularly if you drive frequently in heavy, slow traffic.
  3. Problems with tyres: Whenever you press the brake pedal, the tyres still roll for a few metres (even if you slam on the brakes the car doesn’t stop on a dime). It’s this movement of the tyres after braking that causes excessive wear of the treads, costing you more money in replacements.

For an inspection of your drive shaft, a car brake service or brake and clutch repairs, call us on 07 3809 2711 or send us an email.